DIY Silverado Shock Absorber Replacement: A Step-by-Step Guide
Oct 28,2023 | LOBO ZEAN
If you own a Chevrolet Silverado and have noticed that your ride has become less comfortable, it might be time to consider replacing your shock absorbers. Over time, shock absorbers can wear out, leading to a bumpy and uncomfortable ride. Fortunately, replacing them is a task that you can tackle on your own with the right tools and a bit of mechanical know-how. In this step-by-step guide, we'll walk you through the process of DIY Silverado shock absorber replacement, helping you restore your truck's smooth ride.

Before You Begin
Before diving into the replacement process, it's essential to gather the necessary tools and materials. You will need:
1. New Shock Absorbers: Ensure you purchase the correct shock absorbers for your Silverado's make and model. You can go to LOBO ZEAN and tell them your model, year, or OE number, VIN number, etc., and they can find the shock absorber suitable for your car.
2. Jack and Jack Stands: To safely lift and secure your vehicle, you'll need a jack and sturdy jack stands.
3. Lug Wrench: A lug wrench will be handy for removing the wheel.
4. Socket Set and Wrenches: These tools are essential for removing the old shock absorbers and installing the new ones.
5. Penetrating Oil: Rust and corrosion may make it difficult to remove old bolts, so having some penetrating oil on hand can be a lifesaver.
6. Torque Wrench: To ensure proper tightening of bolts during installation.
7. Safety Gear: Safety glasses and gloves are essential for protecting your eyes and hands.
8. Work Gloves: These will help protect your hands while working on the vehicle.

Step 1: Safety First
Safety is paramount when working on your vehicle. Park your Silverado on a level surface, engage the parking brake, and chock the wheels to prevent the truck from rolling. Don't forget to wear your safety glasses and gloves.
Step 2: Lift Your Silverado
Using the jack, lift one end of your Silverado and secure it with jack stands. Be sure to place the jack stands in a sturdy location on the vehicle's frame, and double-check to ensure the truck is stable before continuing.
Step 3: Remove the Wheel
Use a lug wrench to remove the wheel on the side where you'll be replacing the shock absorber. This will provide better access to the components you need to work on.
Step 4: Locate the Shock Absorber
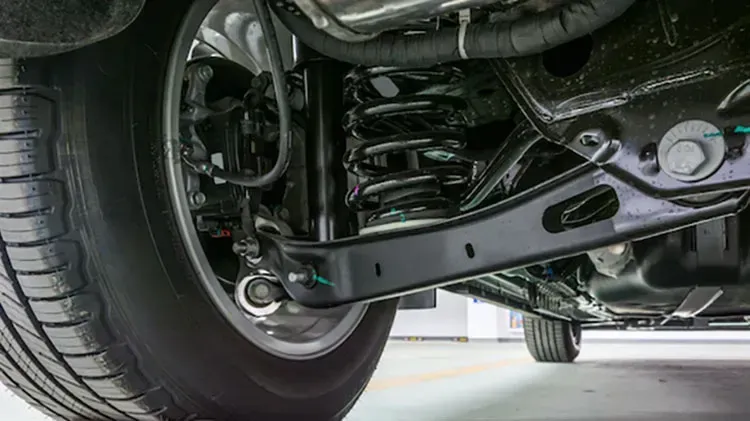
The shock absorber is typically found near the wheel well. You'll see it attached to the frame and the suspension components. Use your socket set and wrenches to remove any bolts and nuts securing the shock absorber.
Step 5: Remove the Old Shock Absorber
Once you've disconnected all the bolts and nuts, carefully remove the old shock absorber. Be prepared for some residual oil or fluid to leak out. Properly dispose of the old shock absorber according to local regulations.
Step 6: Install the New Shock Absorber
Attach the new shock absorber in place and use your torque wrench to ensure all bolts and nuts are properly tightened. Make sure to follow the manufacturer's torque specifications for your specific Silverado model.
Step 7: Reinstall the Wheel
With the new shock absorber securely in place, reattach the wheel and tighten the lug nuts. Be sure to tighten them in a crisscross pattern to ensure even pressure on the wheel.
Step 8: Lower Your Vehicle
Carefully remove the jack stands and lower your Silverado to the ground using the jack.
Step 9: Test Your New Shock Absorber
Take your Silverado for a test drive to ensure that the new shock absorber has improved your ride comfort. Pay attention to how the vehicle handles and if the ride is smoother.
Congratulations! You've successfully replaced the shock absorber on your Chevrolet Silverado. This DIY project not only saves you money on labor costs but also allows you to gain a better understanding of your vehicle's suspension system. Always refer to your vehicle's specific manual and safety guidelines for additional information and precautions.


